How to Make Sugar Skulls (Calavera de Azúcar)
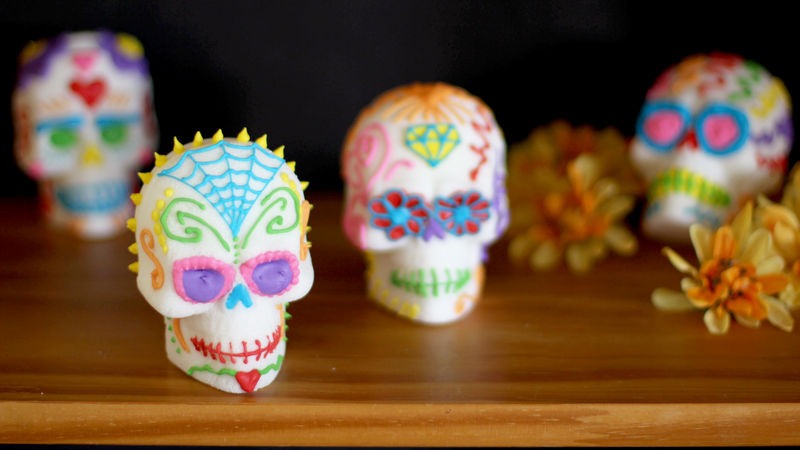 Traditional Day of the Dead Sugar Skulls are decorated with a rainbow of colored royal icing.
Ingredients
Betty Crocker™ gel food color
1/4cup meringue powder
6cups granulated sugar
1/3cup water
7 1/2teaspoon meringue powder
6teaspoons water
1pound powdered sugar
Royal Icing
Sugar Skulls (makes 4 medium 3-D skulls)
Steps
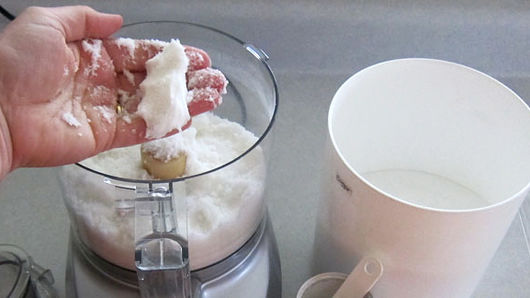 1. Mix the sugar, meringue powder and water together until all the granules of sugar are wet. Pick up a handful of the mixture and squeeze in your hand. If it holds together, its ready. If it falls apart, it will need a tiny bit more water.
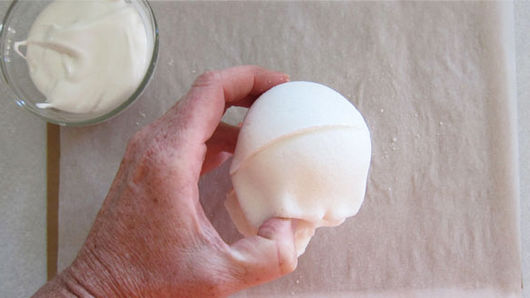
2. Fill your skull mold with the wet sugar, pressing down on the sugar, compacting it as you go. Fill both the front and back skull cavities with the sugar. Scrape off the excess sugar.
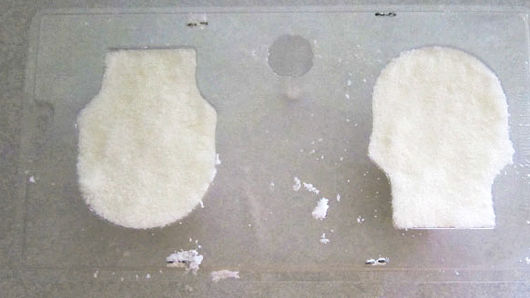
3. Cut a piece of parchment paper and a piece of cardboard just a bit bigger than your mold. Set the parchment paper down on top of the mold. Set the cardboard on top of the paper. Grab onto the mold and cardboard, and carefully flip the whole thing upside down. Set it on the counter, then carefully lift the mold up off the sugar skulls. The mold should pop right off. If the sugar sticks, it’s too wet. Scrape it out of the mold, clean the mold, and add some more dry sugar to the mixture and try molding it again. If your sugar skulls do not hold together, the mixtures needs more water.
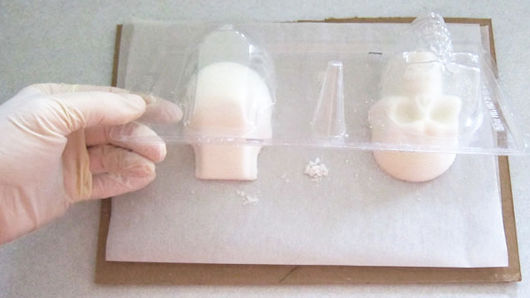
4. Your sugar skulls now need to dry. Midway through the drying cycle you need to carefully flip them over so the back sides can dry out at well. They should be ready to decorate in 12-24 hours.
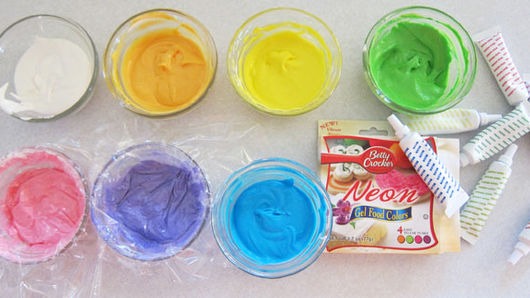
5. Make royal icing. Beat together powdered sugar, meringue powder, and water until its shiny and will hold stiff peaks.
 6. Once your skulls are dried, spread a thin layer of royal icing on the flat part of the back side of each skull. Press the front and back sides together. Use your finger to wipe off the icing that oozes out from in between the two pieces. Allow the skulls to dry for at least an hour.
7. After your skulls are dry, they are ready to decorate. Color small bowls full of royal icing using food coloring. If you wont be using the icing right away, be sure to cover each bowl with plastic wrap.
8. Pipe royal icing onto the skulls. Any simple or elaborate designs. Get as creative as youd like and use lots of bright colors on each skull for a dramatic appearance.
9. Allow your sugar skulls to dry for several hours before using them as decorations for your Day of the Dead event.
 More About This Recipe
Day of the Dead (Dia de los Muertos) is celebrated in Mexico on November 2nd each year. People gather to honor their deceased family and friends, and it’s tradition to handcraft brightly colored sugar skulls to place on altars and graves during the festive celebrations…
Start by mixing the sugar, meringue powder and water together until all the granules of sugar are wet and feel like wet sand. I found it easiest to mix my ingredients in a food processor. That way the sugar crystals became super fine and will pack into the molds really well.
I poured the sugar and meringue powder in and pulsed it for about 30 seconds before adding the water. I stopped pulsing the mixture when it started looking like wet sand, then scraped the bottom of the bowl then pulsed it again a few seconds. If you don’t have a food processor, you can just mix everything together. Be sure to mix it really well though, so you don’t end up with sugar crystals that aren’t saturated with water.
After filling your molds your sugar skulls need to dry. Midway through the drying cycle you need to carefully flip them over so the backsides can dry out at well. Small skulls should be dried for about 8-12 hours. Medium skulls will take 12-24 hours. Really large skulls require some of the sugar be scooped out, leaving an inch wall around the outside.
To do this, allow the tops of the skulls to dry for 24 hours. Then turn them upside down and use a spoon to scoop out some of the soft sugar. You can reuse this sugar to make more skulls if you want.
 When the skulls are fully dry and ready to be decorated you can pipe the royal icing onto them. You can use pastry bags fitted with a coupler and pastry tip, or just fitted with a tip. You can also just fill a pastry bag or zip top bag with icing and then snip off the tip of the bag.
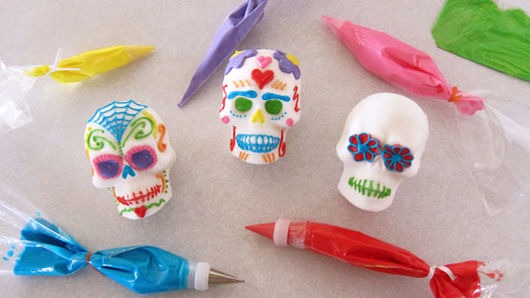
Pro tip: I had more control over my piping when I added pastry tips to my bags. Pipe royal icing onto the skulls. Any simple or elaborate designs can be added, including a spider web. Get as creative as you’d like and use lots of bright colors on each skull for a dramatic appearance. You’ll love having these beautiful, colorful sugar skulls as decorations for any Day of the Dead event!
| Insurance for your American or Canadian Vehicle while in Mexico | Insurance for your Mexican Vehicle |
 |
 |